Install Guide
Step 1 — Install the Add-in
- Manifest Link: https://ooa.openusersystems.com/manifest.xml
365 Self-installs, please follow the guide below
OUS Hub can be currently be installed using a manifest file. Once the product has been officially released, it is planned to be made available via the Microsoft Marketplace (formerly AppSource). This will make it much simpler to install.
-
Open Outlook on the Web and sign in (or open New Outlook on Windows/Mac).
-
Go to the following Microsoft link to access custom-addins: https://aka.ms/olksideload
-
Click My add-ins in the left sidebar
-
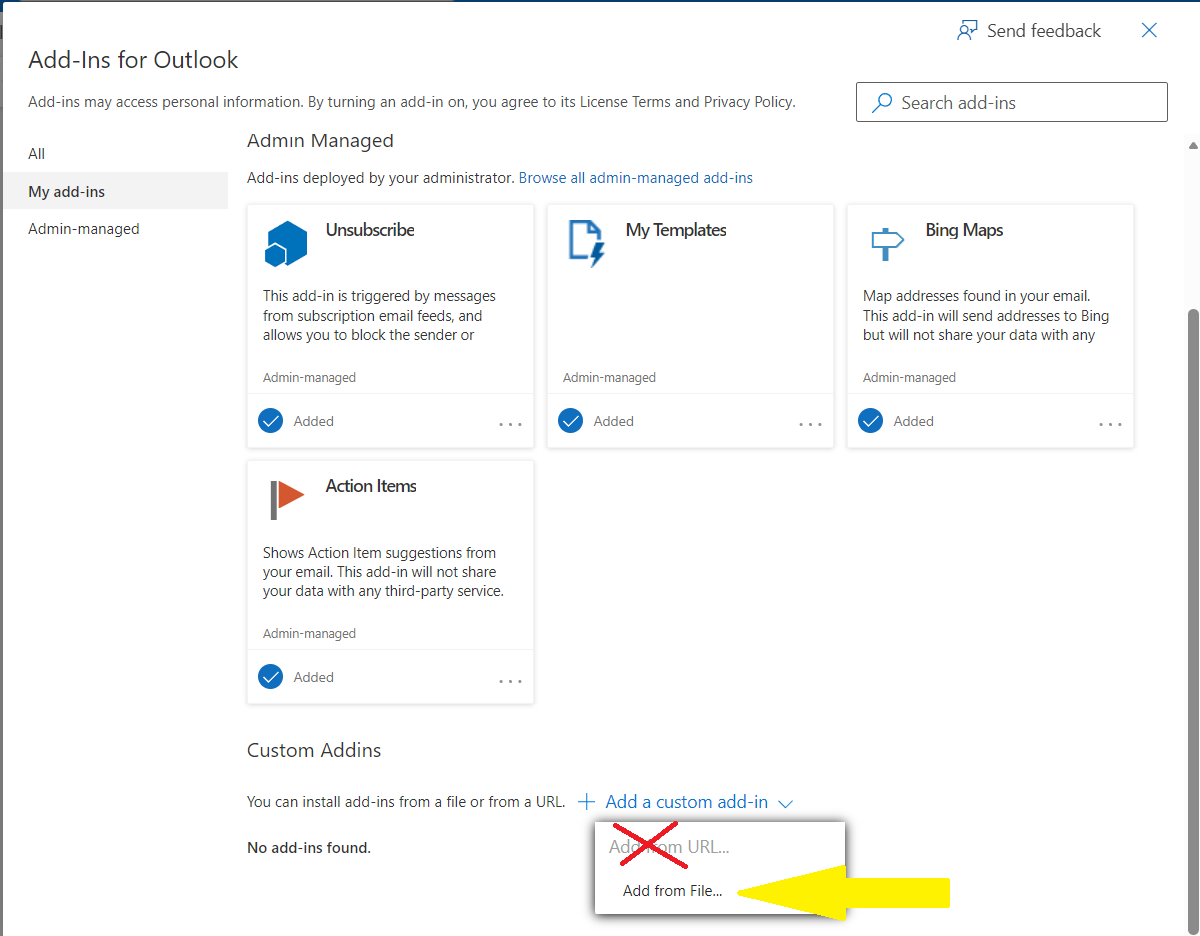
Scroll to Custom add-ins then click + Add a custom add-in > Add from File. The Add from URL option is intentionally disabled by Microsoft but this is not a problem.
-
Highlight then copy the manifest link from above. Paste the manifest URL in the file name box that appeared and press "Open":
-
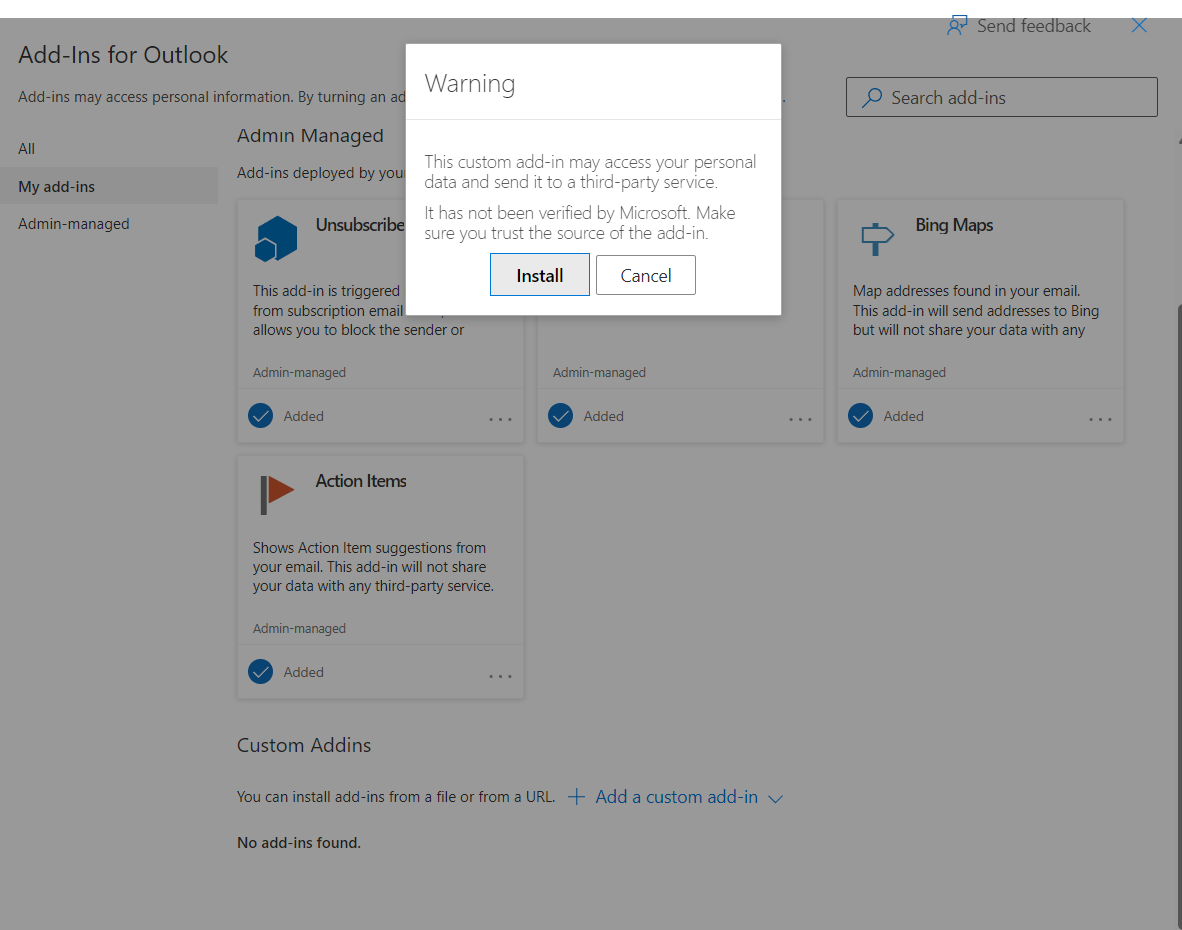
Click Install and confirm any prompts.
-
Close the dialogue box and refresh your Outlook browser window.
Alternative: 365 Central Deployment (recommended for larger organisations)
Your Microsoft 365 administrator can deploy OUS Hub to everyone in your organisation via the Microsoft 365 Admin Center using the manifest URL mentioned below. Once deployed, OUS Hub appears automatically in Outlook for all users — no action needed on individual machines. Go to Settings > Integrated apps and choose "Upload custom apps" from the 365 admin center. The choose the manifest link option, and copy the URL from the manifest link above in Step 1.
Alternative: Exchange Server Deployment (not 365)
If your organisation uses Exchange Server on-premise instead of MS 365, OUS Hub is still supported but requires a slightly different approach to install it which involves a system administrator.
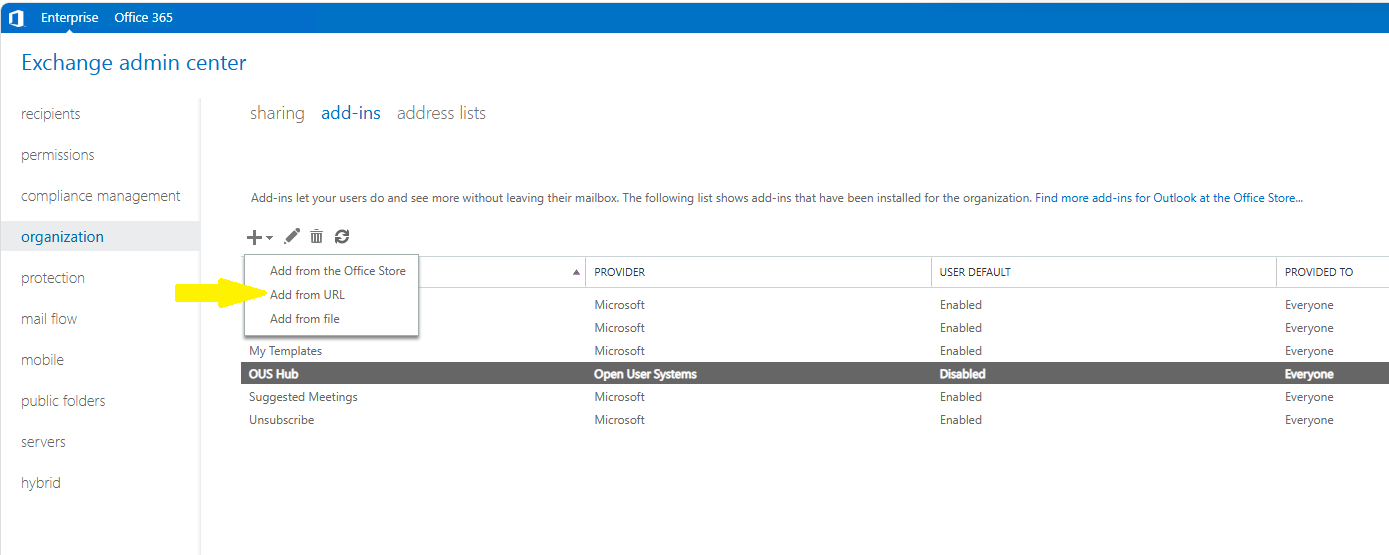
As a system administrator, go to the Exchange Admin Center then follow screenshot below to install the addin via the manifest URL option, using the manifest link from Step 1 above.
- 
Step 2 — Open Add-in and Pin
-
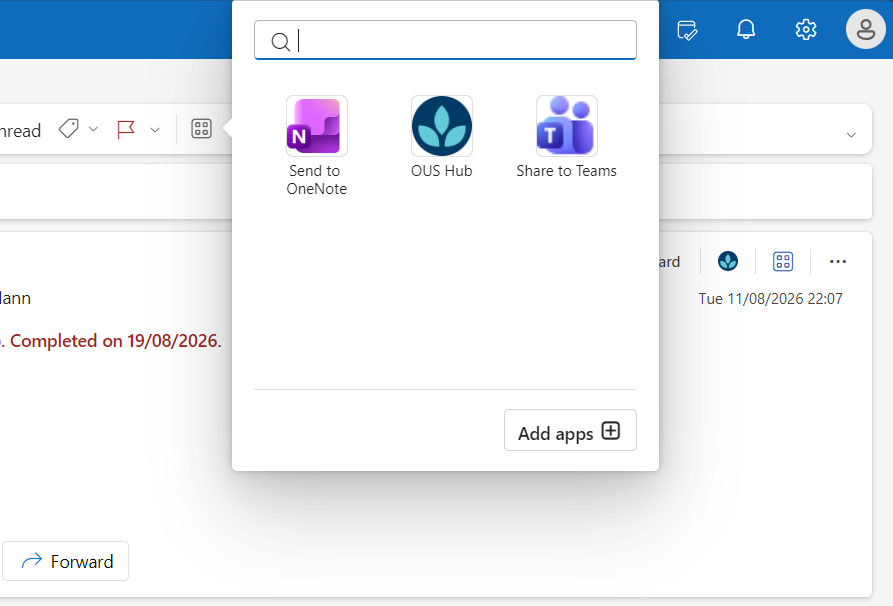
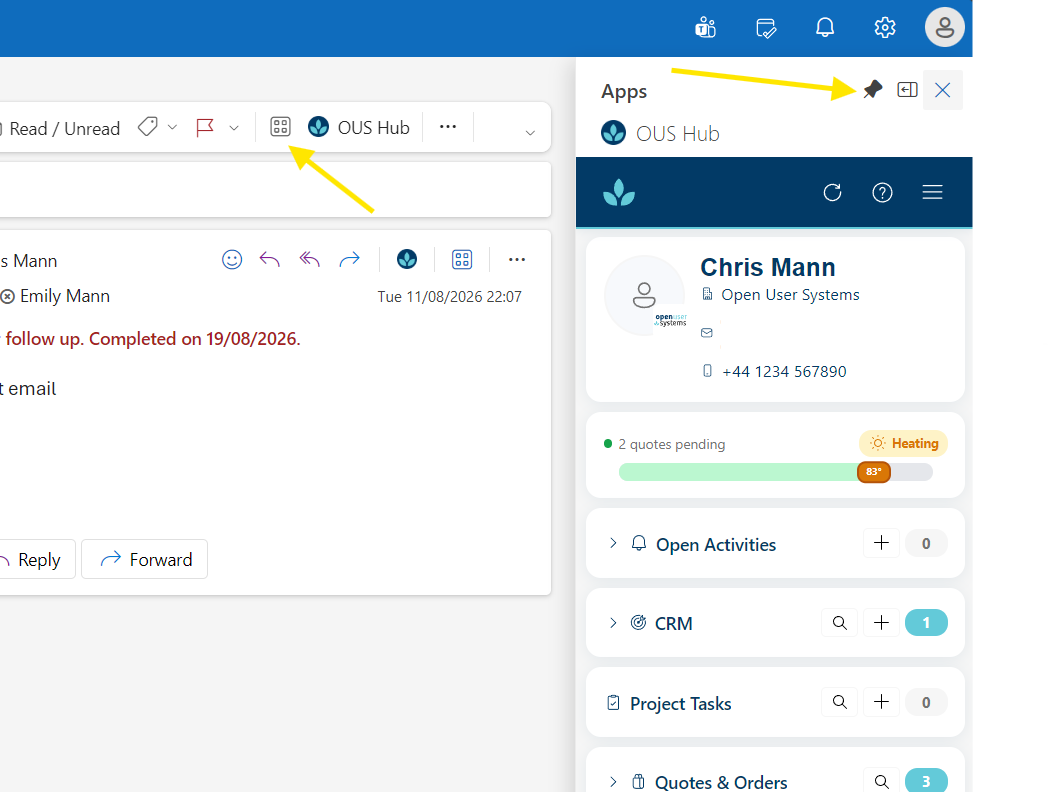
Click on the Add-ins button in the ribbon, click OUS Hub
-
Taskpane: When you see the OUS Hub pane, click the "pin" symbol in the top right, this keeps it open at all times
Step 3 - Generate Your API Key*
OUS Hub authenticates using an Odoo API key rather than your password. This is more secure and won't break if you ever change your password. *Note: If you are on a version of Odoo older than v14, API keys are not used. Instead you will be prompted to enter your password to login.
-
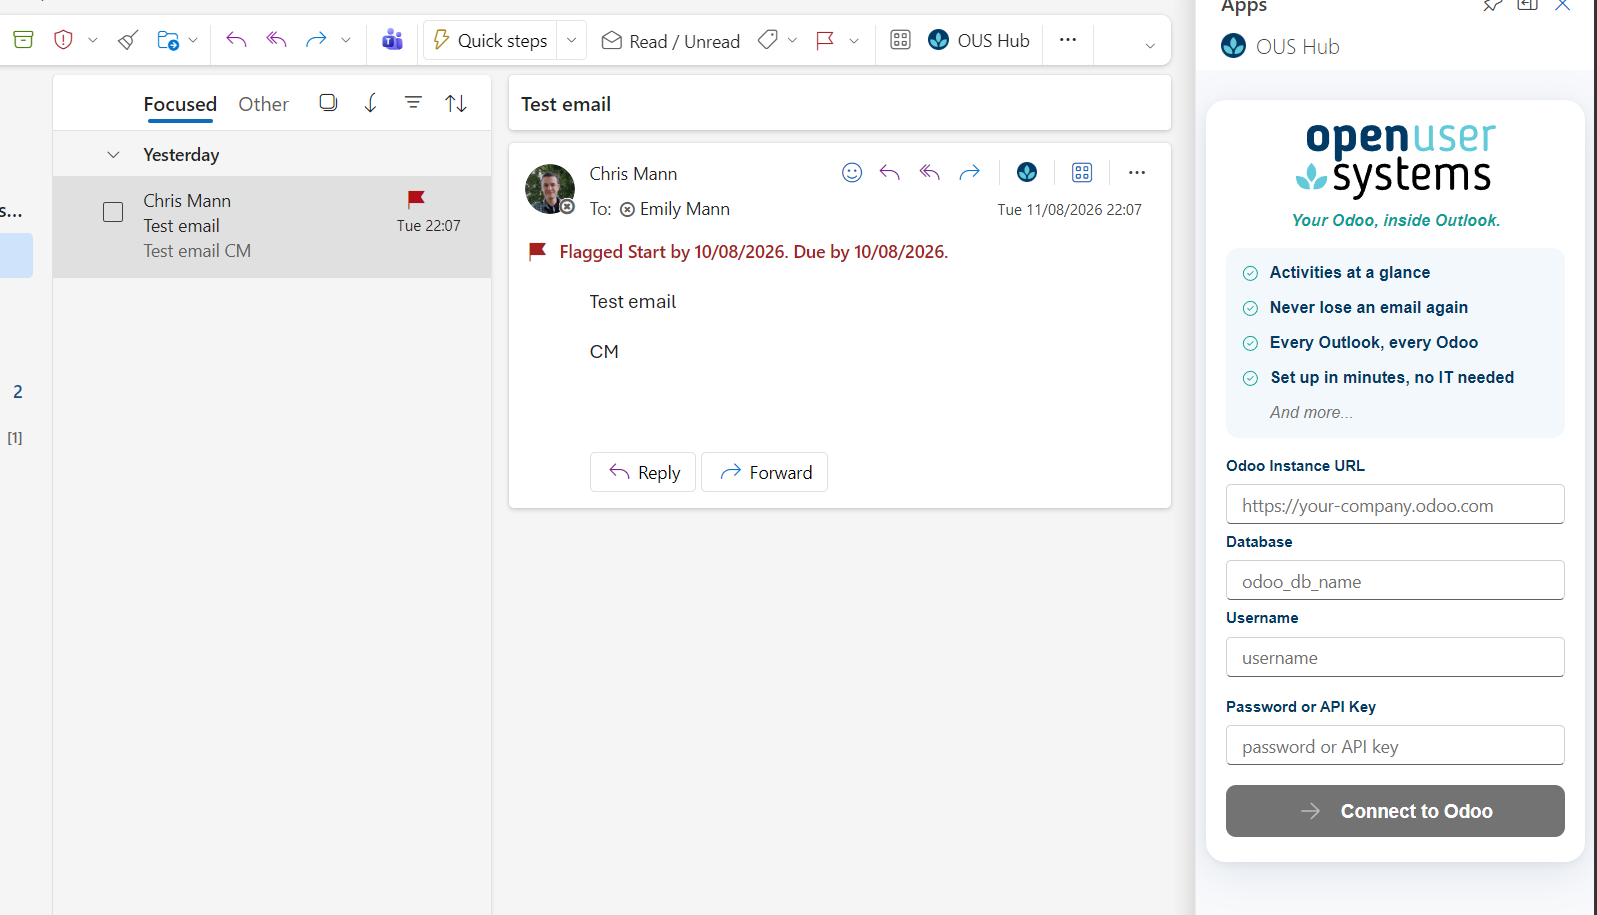
Click on any email and then click on the OUS Hub Add-In in the top right of your command bar.
-
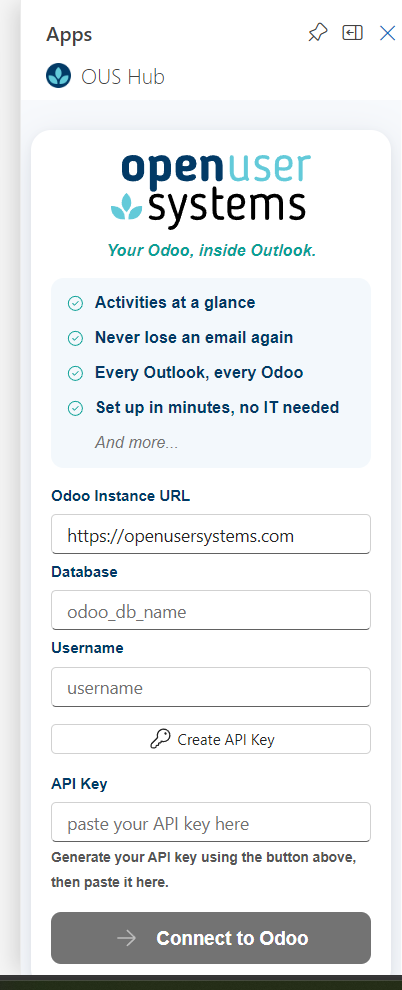
Enter your Odoo Instance URL, Database and username and then click on Create API Key.
-
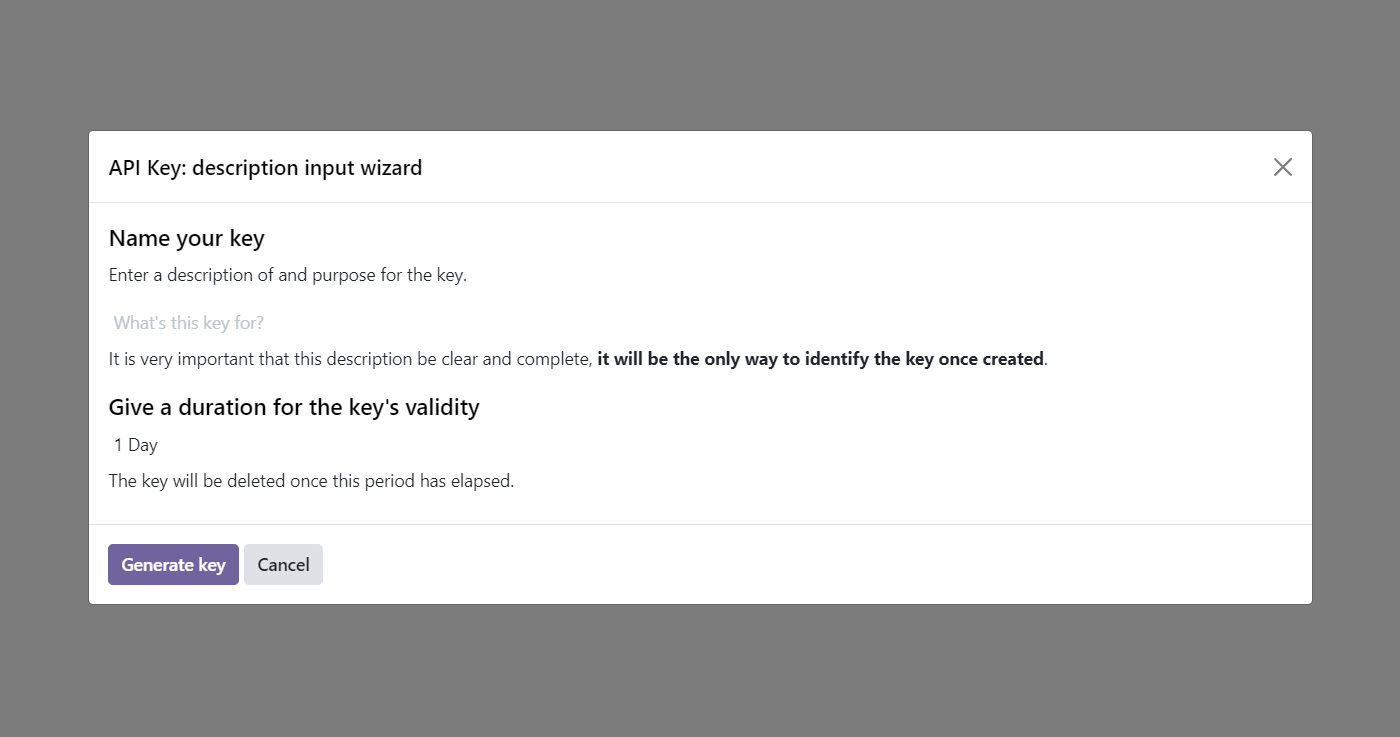
In the next screen, give your key a unique and identifiable name (e.g OUSHub-Laptop) and select how long the key should be valid (e.g 1 Year) then click 'Generate Key'. We recommend 1 year maximum, however if you wish this to be longer then speak to your Odoo admin who can change the setting per security group to be longer.
-
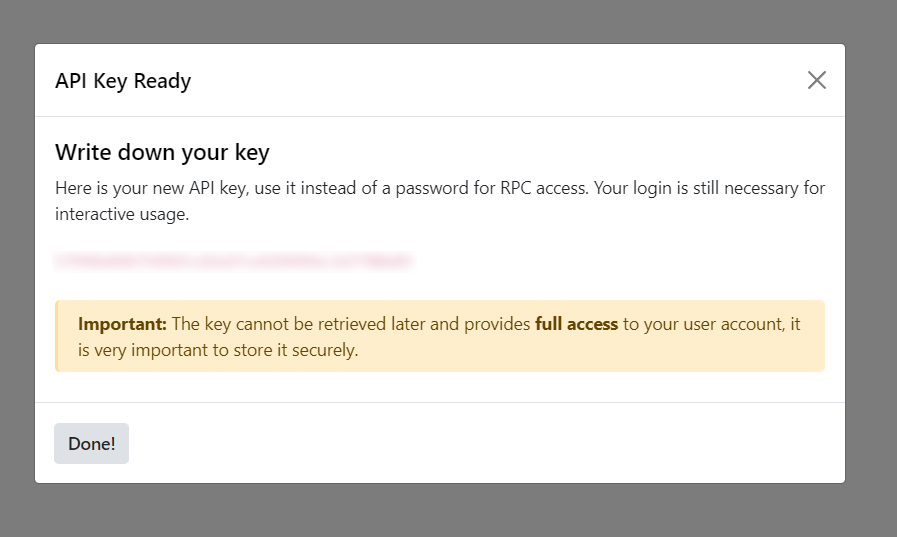
Follow the next instructions and you should have a screen with your API Key. Copy this into clipboard and keep it safe. Then click done.
-
Return to Outlook inbox and paste your API Key into the same log in screen with your Instance URL, Database and Username.
Step 4 — First Time Log-in
-
On the login screen, enter:
- Odoo URL — e.g.
https://mycompany.odoo.com(no trailing slash) - Database — your Odoo database name (case sensitive)
- Username — your Odoo login email address (case sensitive)
- API Key — the key you generated above
- Odoo URL — e.g.
-
Click Connect.
OUS Hub login screen with all four fields labelled and filled in with example values
OUS Hub verifies your credentials and checks your licence automatically. On success you are taken straight to the Contact Card for the email you have open.
Your settings sync across devices. Once logged in on one machine, your Odoo connection details roam to Outlook on your other devices automatically via your Microsoft account.